


I love to find little ways to help out my family's gut as we go through the year. Ferments are a big part of that, and this Fermented Garlic is absolutely delicious and super easy to make!

There are a couple times in the year when one who grows garlic finds themselves with garlic they need to use up. If you don't grow garlic, that's okay, grab some from a local farmers market or hit up a neighboring farm for some really great garlic.
The two times are this: when you pull your garlic from the garden, there's always some you can tell need to be used up, they're not going to store well. You can peel them, trim off the spots that are no good, and make this, excellent!
The other time is in spring when you’re noticing some of your stored garlic is starting to sprout and you don't want that hard earned garlic to go bad!! Time to ferment some and extend its shelf life.
While garlic lovers enjoy it just for the taste, it's a great immune booster to slice a clove up and each of my kids takes a pill sized piece and swallow it with water. Garlic is full of all sorts of amazing things!
I use fermented garlic in salad dressings too... it's pre-peeled and ready to just throw in the blender or garlic mincer?! YES! SCORE! I’m sorry, I wont touch any pre-peeled or jarred garlic from the store. You can't convince me that's delicious stuff, I’m too many years into knowing what good garlic is...
Key Ingredients

Garlic - Get the good stuff, from a farm you trust (or your own backyard!).
Herbs - You'll learn what you like, but some of my go-tos are bay leaves, dill, peppercorns...
Brine - Just a simple salt water to keep things safe while fermenting.
How to Make Fermented Garlic Cloves
***See recipe card below for precise measurements and instructions.***
Step 1: Peel your garlic. This may take a while so be patient or get help, listen to an audiobook to pass the time enjoyably.

Step 2: Mix up a brine separately until dissolved well, then top off the jar.


Step 3: Add herbs, put on a lid, and shake to distribute. Then remove the lid and add a weight of some sort to keep things inside the liquid.


Step 4: Cover with a towel and let ferment for at least 1 month, if not 2.
Tips and Tricks
- Share your favourite garlic peeling hacks in the comments - I just sit and patiently do it, honestly. It's a good things for little fingers to keep busy, too.
- No need to buy a fancy weight. Any rock from the yard will do. I aim for smooth ones so I can clean them easily, and you want one that fits snugly.
- Again, you don't need a special airlock lid but you CAN use one. Otherwise just "burp" it every other day or so to make sure nothing explodes.

FAQs
You all know that around here I don't fuss much over organic. It's just really hard to get certain types around here, and it's not worth the price difference. But for this, where it's something I'm counting on to help our bodies, and since we are eating it raw, I do try and get organic. But that's not just a label - it's knowing where it's from so if you have a farmer you trust, that's good enough in my book. Knowing the farmer means knowing your food.
You need to keep the ingredients below the water line to keep mold out. You can do this with a stone, glass disc, and you can even add water to a sandwich baggie and set it on top. There's no need to get fancy here! Just keep an eye on it and add more salt water if it evaporates.
Make sure and get salt that is pure salt - not anything with iodine or anti-caking agents. So you might need to spend a little bit or check out "pickling salts" and things of that nature. This is imperative for the fermentation to occur.
Make sure you don't have chlorinated water. You'll either want to filter it with the appropriate filters that remove these things, or use distilled water.
Photos by Dante from Shire by the Sea
More DIY Favourites

Hey friends, don't forget to follow me over on Instagram, cause if you like me here, I post there a LOT! I'm also on YouTube with tutorials and Facebook for all sorts of things.
If you like this recipe, I’d love if you reviewed it so others can find it easier. Sharing this recipe on Facebook or Pinterest is another way you can help us out at no cost to you. Thanks, xo Kate

Fermented Garlic
Ingredients
- 8 - 12 heads organic garlic peeled, enough to fill a quart mason jar
- 2 cups filtered water
- 1 teaspoon salt ½ teaspoon per cup of water if adjusting
Favourite fermenting spices/herbs:
- 3 bay leaves
- 1 tablespoon whole peppercorns
- 1 teaspoon whole cloves
- 1 teaspoon dried dill
Instructions
- Peel garlic cloves clean and fill mason jar up to 1 ½ inches below the top.
- Once garlic is peeled and added to jar, measure out your salt and mix with your water for the brine then add to your garlic jar until 1 inch away from top.
- Add in your spices/herbs and then seal your jar tight and flip and shake to distribute throughout the jar.
- Open lid and make sure your garlic and herbs are settled in nicely. Add a weight on top. I use a clean heavy flat rock that fits well. You can use whatever method that will keep your garlic submerged, like a small plastic bag with water, glass disc, etc.
- Put lid back on and check your ferment regularly off-gassing and making sure the water level is topped up, (every other day) or use an airlock lid.
- Cover jar with a tea towel and ferment in a dark place, cupboard, etc.
- Within a week you should begin to notice bubbles. The brine will start to colour to a nice rich hue of brown.
- You can start to enjoy your garlic after 4 weeks, but 2 months is ideal if you can wait.
- Once fermentation is finished store in the fridge and enjoy the wonders of fermented garlic!!
Notes
- I love to add to salad dressing!
- I can eat these straight up.
- If my kids need a little bit of an immune boost, I slice the cloves into "pills" they can swallow with water.
- Adjust herbs to your taste once you know what you like.
Staveh
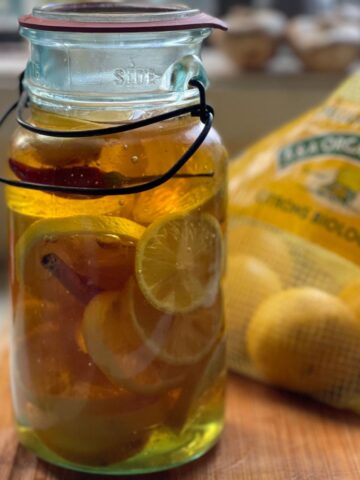
Have you ever fermented garlic in honey? I just started my lemons in honey and still have some liquid honey to use.
[email protected]
Yes, Kate has done that, as well as a hot pepper!
Elizabeth
I’ve always been a big fan of garlic, but this is next level. Wow. Such a great flavor to add to my savory dishes. This has become a staple in my kitchen
Kourtney R
This lacto fermented garlic recipe is what saves the last of my garlic harvest every year! I ferment all of the cloves that won’t keep through the winter/spring and they last in the fridge until summer harvest.