


Everyone loves a hearty bite of rich, deep chocolate. It's really fun to start with raw cacao and turn it into your own favourite daily treat!

I love making our own treats at home. Whether it's cheese from raw milk, steeping our own vanilla, or keeping sourdough alive, they all nourish our family in body and soul.
This is not your everyday recipe. It definitely takes some time and work, especially if you want to temper your chocolate. And I admit I definitely keep "mama's emergency stash" of really lovely chocolate bars from the store. But friends, this recipe surpasses all of those bars. The homemade raw cacao chocolates are super rich and a true experience.
Key Ingredients

Cacao Nibs - These crunchy bits are broken up roasted cacao beans. Many use them as vegan chocolate chips. They are not processed beyond roasting, so they still have the cocoa butter in them.
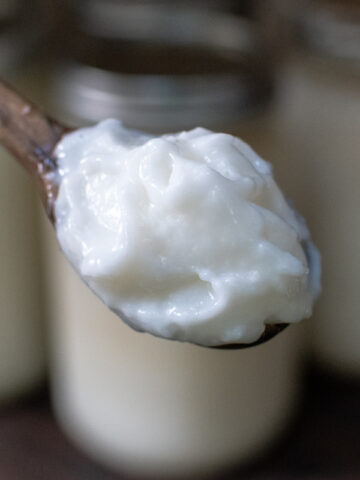
Cocoa Butter - This is cold-pressed out of cacao beans. This fat has a mild chocolate taste. Leftover from making this butter is where we get cocoa powder.
Maple Syrup - Raw cacao will need a sweetener to be thoroughly enjoyed!
Vanilla and Salt - These are key. A touch of each will really balance out all of the flavours for the best chocolate enjoyment.
Special Equipment

In order to process the cacao nibs, we need to grind them up. Think of it almost like making almond butter, except that these will actually liquify once fully processed. It is called "liquor" but of course doesn't contain alcohol.
Pictured above is the Vitamix Dry Grains Container. It is much smaller than the regular blender jar, which is what we need here. We want the nibs to be able to grind up, to turn to paste, and then liquid. A coffee or spice grinder will work, but will take a very long time and need to be done in batches. A food processor will be too large for the nibs to stay in contact with the blades. You might do better if you have a mini food processor or chopper.
You will also want a candy thermometer if you are going to attempt to temper your chocolate. This process needs very specific temperature ranges, both for heating and cooling, and these will have a clip to pop on your pan to keep it in the cocoa but off the bottom of the pan.
How to Make Raw Cacao Candies
***See recipe card below for precise measurements and instructions.***


Step 1: Add cacao nibs to your small blender jar and begin to process to crumbles.
Step 2: Stop and scrape down as necessary to ensure all bits are processed.


Step 3: Soon it will turn into a paste!
Step 4: Next it will turn to liquid, know as liquor.


Step 5: Melt cocoa butter on the stove over low heat.
Step 6: Stir processed cacao into the cocoa butter.


Step 7: Melt gently until combined.
Step 8: Set over ice if you want to temper (see recipe card for specifics).


Step 9: Heat again to temper, if desired.
Step 10: Add to moulds with desired mix-ins and let set up.
FAQs
Tempering is a process that allows the finished chocolate to be super smooth and shiny, just like you'd get from a fancy chocolate shop where they make their candy on hand. It is totally optional - your candy will be just fine if you don't temper it, though it might not look as professional. And some days, all I want is decadent chocolate. But if you want to go all out and learn a new technique, I walk you through it in the recipe card below.
See the equipment section above for more info, but basically when cacao nibs are fully processed they turn into a liquid known as liquor. There isn't any alcohol here, though. This is just processing the purest form of chocolate!
Cacao nibs are the roasted, cracked cacao beans. They have a slight taste of chocolate, but not the aroma. These contain the fat as well, known as cocoa butter. The resulting cacao liquor can be processed further to separate out the cocoa butter, and what is left is cocoa powder (which is fat free, since the cocoa butter was pulled out). When your chocolate bar says 60%, for example, this means it is 60% cocoa beans. Because white chocolate is cocoa butter without cocoa solids, it technically isn't even chocolate!

Photos by Dante from Shire by the Sea
More Recipes You'll Love


Hey friends, don't forget to follow me over on Instagram, cause if you like me here, I post there a LOT! I'm also on YouTube with tutorials and Facebook for all sorts of things.
If you like this recipe, I’d love if you reviewed it so others can find it easier. Sharing this recipe on Facebook or Pinterest is another way you can help us out at no cost to you. Thanks, xo Kate

Raw Cacao Chocolates
Equipment
- Candy Thermometer
- Vitamix with dry container or good blender
- Chocolate moulds, doesn’t have to be anything fancy
- Bowl with ice, optional for tempering
Ingredients
- 150 grams raw cacao nibs
- 1 ¼ cocoa butter wafers
- ¼ cup pure maple syrup
- 1 teaspoon pure vanilla extract
- Pinch sea salt
Add-ins:
- Chopped nuts
- Dried fruit
- Bee pollen
Instructions
To Make Chocolate:
- Add nibs to blender (see notes) on low to medium speed until blender spins without contact with the nibs.
- Stop blender and scrape/loosen cacao that is stuck to the sides and bottom of your mixer. I accomplish this with a combination of spatula and the handle end of a wooden spoon, carefully dislodging any stuck, melded cacao nibs.
- Place container back on base and repeat this process until you have a thick cacao paste.
- Throwing in a few of your cocoa butter pucks can “lubricate” this process and make it go a bit smoother. Cacao nibs already have fat in them (cocoa butter) but the extra addition of some cocoa butter will speed the process up.
- On low heat, add cocoa butter to a sauce pan until golden yellow and melted. It’s good to have it melted and ready to receive your cacao liquor immediately as the liquor will solidify fast.
- Once the thick paste is formed, put blender on a medium speed and attentively watch: this is when the paste will begin to liquify. This liquid is the brown gold of chocolate, but it is dark and bitter. Blend until liquid is flowing well in blender.
- With spatula, add your chocolate liquor to the melted cocoa butter. You may need to use wooden spoon again to dislodge any stubborn solidified chunks that may have stuck to your blender. All in good time.
- Stirring on low heat, add the vanilla, a pinch of sea salt, and fold in the maple syrup until mixture is thoroughly blended. Be sure not to heat too much!
- You may now choose to add the mixture to moulds and have your chocolate all set! Or, you can level up and learn to temper your chocolate.
How to Temper:
- Clip on a candy thermometer to your pan, and check chocolate mix frequently until temperature falls within 118-122°F while continually folding mixture.
- When temperature range is hit, put pan on a bed of ice in a bowl larger than the pan or that allows the pan to settle firmly on the ice. Continue folding mixture until temperature drops to 85-90°F.
- Place pan back on the burner on low and continue stirring until temperature is once again at 118-122°F.
To Shape:
- Take pan off heat and spoon chocolate into moulds until it reaches the top of each mould space.
- If you are adding in dried fruit, nuts, etc, you can spoon half in, add your extras, then top off with chocolate.
- Let cool slowly (do NOT place in the fridge) but make sure you fill moulds before chocolate solidifies. Also you could reheat as needed.
- When chocolate is solidified, carefully remove from moulds and enjoy your masterfully crafted raw chocolate (in moderation mind you).
Notes
- The first and most important part is getting your cacao nibs into a liquid form called “liquor.” Don’t fret, there aren't any strong spirits in this liquor. What you are doing in this stage is processing the nibs into a powder that becomes a liquid from the heat and action of your chosen processor: coffee grinder, blender, food processor. You can accomplish this with each of these machines but after much trial and error, I recommend a good blender for the amounts we are working with here. Vitamix with dry container is perfect. As the key is to crush and mix the nibs while keeping them in a confined tight space. Too little room, (like a coffee grinder) and the process can take a long while. Too much, like a food processor, and the nibs seem to want to spin around.
- Tempering will make your finished chocolates shiny and smooth, and look professional. This also seems to extend the shelf life some, as well as help avoid "chocolate bloom" which is the harmless white stuff that appears on the surface after your chocolate sits around a while.
- I have made 45-60 chocolates or so. It all depends on the size of your moulds.
Leave a Reply