
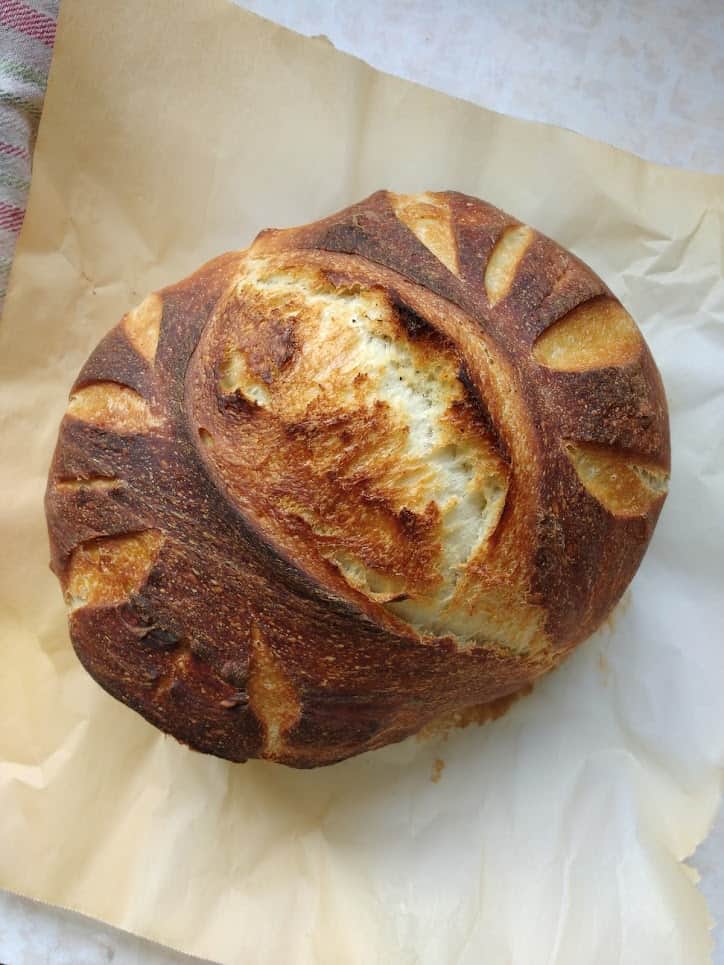
What is a boule? A boule is a free form round-ish, artisan loaf of bread. I love the look and simplicity of them. It looks so beautiful.
My preference for this sourdough boule recipe is to use all white flour. You can hear me ramble about and answer FAQ about sourdough here. I love me some whole wheat flour, but this loaf? It's made for white. That being said, subbing half whole wheat still makes a lovely loaf! All this rambling to say...make it white first...you'll love it.
What if you don't have a dutch oven for baking? Thats okay! You can use any oven safe pot, minimum 1 gallon size. You'll need this big for the loaf to fit. An oven safe pot means it can't have any plastic or glass on it. I have a stainless steel pot that I use so I can bake two at a time. If the only "bad" part on your pot is the lid, try putting a metal cookie sheet on as the lid. The point of the dutch oven, is that it traps the steam as the bread dough expands/bakes in the oven, mimicking the steam injected industrial ovens.
There is some really broad rising times here. Just trust me here. The beauty of sourdough is it's flexibility!
How to Bake a Basic Sourdough Boule
To bake a basic Sourdough Boule begin by mixing your 3 cups of flour, the sugar and salt together. I mix starter, water and oil together in a quart jar. When using honey, make sure to add it in with the wet ingredients, not dry.
Then you mix the wet ingredients into the dry ones. If using any amount of whole wheat in your sourdough boule, let it sit 20-30 minutes to "autolyze". This makes sure that you don't add too much flour and get a dry loaf, as the bran in whole wheat takes a bit to absorb water.
Knead the dough for a few minutes, until it passes the windowpane test. To windowpane test, take a golf ball sized dough ball and stretch it out thin, to see if you can see light through the middle of it before the dough breaks. Return dough to the bowl, cover with a plate/lid/wet tea towel/beeswax wrap. If desperate, use plastic wrap. But I prefer not to have it in the house.
Let the dough sit for 8-18 hours. Yes, this is a long period of time. It's going to depend on how warm your house is. If your house is super warm, put it in the fridge after a couple hours. I prefer to mix this up late afternoon and let it sit all night. 18 hours is more of a tangy-sourdough taste, I usually aim for 12 hours, that's my favourite!
After 12 hours, scoop the dough out onto a floured counter with your hands. Form a loaf by almost reverse kneading? Hard to explain...hmmmm, tuck the sides of the dough underneath in on itself until you've got a smooth tight loaf, it'll take about 5-6 times. Dust the top of the loaf with flour. The flour helps with the pretty crusts we're all trying to get.
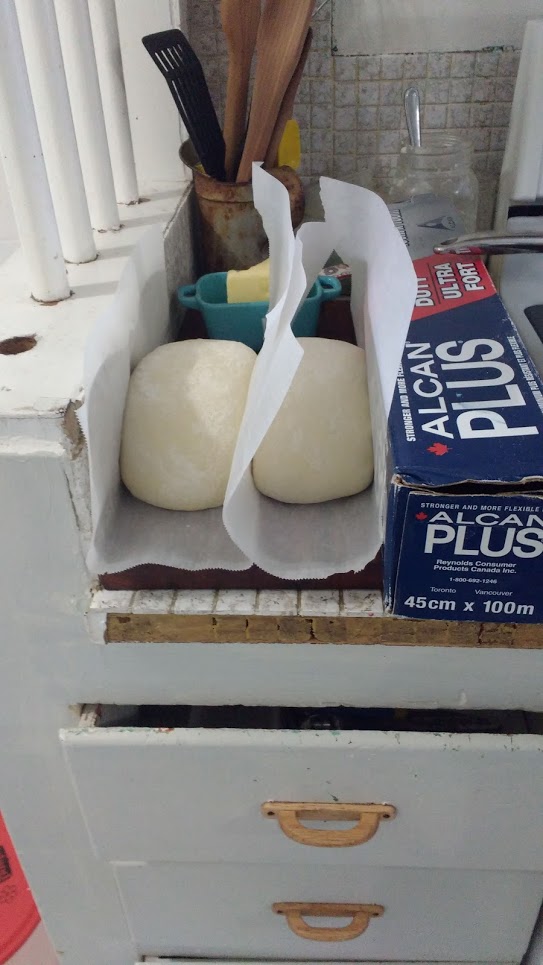
I like to use parchment as a "sling" for the dough, but this is optional. Set the dough aside to rest (uncovered!) for 30 minutes to 3 hours. I usually aim for about 1 ½ hours. I like what happens when I "support" the dough by propping it up, but this is optional. You pick. Some people have fancy baskets...I MacGyver it. This allows the dough to rise up and not flatten out if you skip supporting it. It won't drastically flatten out, just a bit. (Don't you like my fancy kitchen?!)
Thirty minutes before you want to bake, put your pot in the oven and preheat the oven to 500F. Yep, 500F.
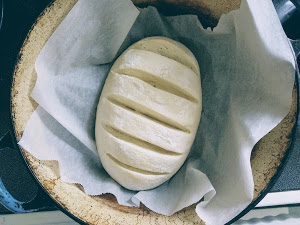
When you're just about ready to put the dough into the pot, get your sharpest knife and slash the top of the loaf. My preference is 3-5 horizontal/angular slashes. Slash deep. ¾-1" deep. This allows for the bread to expand without cracking the crust all over the place.
Take the pot out of the oven, lower the dough into the pot, put a lid on, and return to the oven.
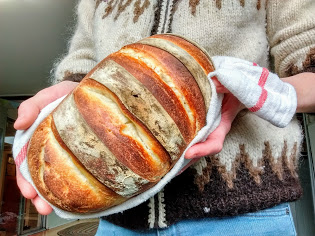
Bake the sourdough boule for 25 minutes. Take the lid off and bake for another 5-15 minutes. Sourdough can be kinda hard to tell if it's done, but an internal temp of 195F with an instant read thermometer tells you it's done. Otherwise, it's somewhat of a guessing game, and I go for the 15 minutes. I'm yet to over bake a loaf, only under bake. When it's done, remove pot from the oven, Remove loaf from the pot and put on a cooling rack. Let sit minimum 15 minutes, preferably 30-60 minutes to allow the gluten structure to set up for you. This makes a nicer loaf!
Now slather it with butter and enjoy that loaf!
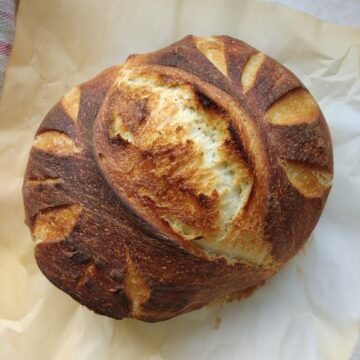
Basic Sourdough Boule
Equipment
- Dutch Oven
Ingredients
- 3-3 ¼ cup organic unbleached white flour can sub for up to half whole wheat, including freshly ground
- 4 tablespoons sugar or 2 Tablespoons honey if using honey, add it into the wet, not dry ingredients
- 1 ½ teaspoon salt
- ¾ cup sourdough starter fed in last 24-36 hours, but has doubled since you fed it
- 1 cup water
- 2 tablespoons oil I use olive
Instructions
- Mix 3 cups of the flour, sugar and salt together.
- In a quart jar mix the sourdough starter, water and oil. If using honey, make sure to add it in with the wet ingredients, not dry.
- Mix wet into dry. (If using any amount of whole wheat in here, let it sit 20-30 minutes to "autolyze".)
- Knead it for a few minutes, until it passes the window pane test.
- Return dough to the bowl and cover.
- Let it sit 8-18 hours depending on how tangy you want your bread.
- Scoop dough out onto a floured counter. Form a loaf by tucking the sides of the dough underneath in on itself until you've got a smooth tight loaf. It will take about 5-6 times.
- Dust the top of the loaf with flour.
- Using parchment as a sling, set dough aside to rest (uncovered!) for 30 minutes to 3 hours. I usually aim for about 1 ½ hours.
- 30 minutes before you want to bake, put your pot in the oven, and turn the oven onto 500F.
- Deeply slash the top of the loaf. (¾-1" deep)
- Take the pot out of the oven, lower the dough into the pot, put a lid on, and return to the oven.
- Bake for 25 minutes, take the lid off, and then bake for another 5-15 minutes or until it reaches an internal temperature of 195F.
- Transfer the bread to a cooling rack.
- Let it sit for a minimum of 15 minutes, preferably 30-60 minutes to allow the gluten structure to set up for you.
Nutrition
More Sourdough Recipes
Once you've mastered working with sourdough you'll find you're wondering what other recipes you can try with it now? Here are my tried & true favorite sourdough recipes!


Brittany
Can you explain the started? Where do you get it and what do you mean feed it? (Total newbie).
Thanks!
katehosie
Check out my blog post Sourdough 101 for all the details! 🙂
Rebecca Schwen
Okay, questions- the parchment is okay to go into the Dutch oven at 500!? And when you say the starter was fed in the last 24 -36 hours and has doubled - like doubled because it's so bubbly or doubled because you added and equal quantity of flour and water to it as were already present?
katehosie
Sorry for the delayed response...doubled because it has been fed and bubbled up to double. Yes parchment is just fine! It'll be brown but it's not exposed or touching open flame. Check out sourdough 101 blog post for more details 🙂
Julie Huntsman
Kate,
How many loaves does this make?
Also thanks for making sourdough baking easy.
Julie
katehosie
Just one loaf!
Lindsay
I’ve tried this recipe about 4 times now and I keep getting a very burned/black bottom of the loaf. I’ve tried not preheating my Dutch oven, lowering baking temp, shortening time....still burned bottom. Any advice?
katehosie
Try taking it out of the dutch oven and put it directly on the oven rack. Some ovens just seem to burn this bread for no apparent reason...
Desirae Howell
Would you take it out after the 25 minute mark? I had the same issue, but I could eat the rest of it all by myself lol!
ambertaube
My oven does not go all the way to 500. How long would you bake on 425?
katehosie
Checking your internal temp is really important, hard to guess
Anne
Hello! Is step 8 done in the fridge or in a warmish spot in the home? Thanks!
kateschat
are we talking step 9? If so, on counter in warm spot.
Anne
Hi! So sorry for late reply! I meant to type step 6 (bulk ferment). I tried it without refrigeration and it worked great. Wondered if cold ferment would make a difference. Thank you!
kateschat
Love it!
Kaeleigh
Love these easy to follow boule instructions! I make this one when I want a "fancier" looking bread compared to the sourdough sandwich loaf.
Heather
This is my go to recipe for boule. We love it!!!
HealthyLivingwithChristene
This tutorial mixed with the highlights on IG have helped me come along way in sourdough.
Heather
Well worth the process! Crowd pleaser for sure!
Heather
I love using this recipe when I want a fancy, yet easy-to-make sourdough loaf. The step-by-step instructions are so helpful! Kate is definitely my sourdough hero, I have learned a lot from her. 🙂
Carli Morrow
This recipe and your tutorial helped me immensely when I started baking sourdough, it is definitely a go-to for us!
Carli Morrow
We love this bread and the tutorial that goes with it!
Susanna
The first sourdough recipe I made, so easy and delicious!
Kim
Love this recipe!
Kelsey Carter
So this recipe is also very easy to follow. I tend to like more of an open crumb on my sourdough boules, so I should try adding more water or slightly less flour. Thank you!
Cassidy
Such an easy and simplistic recipe for a delicious outcome!
Can’t go wrong with this basic boule
TAMARA STERR
Love this recipe! Even my husband will eat this one. He doesn't like chewy sourdough, so this is fantastic! Thank you.
Kaitlyn
This was the first sourdough recipe I ever made. Super delicious. All the employees at our company ask when I am making more.
Emily Theresa Gardella
This is such an easy, straight forward recipe and helped me get over the baking my own bread hump. Thanks for creating a resource that helps make sourdough accessible.
Shaundy
This has become my favorite go-to sourdough boule recipe! The texture is perfect!
Mariah Babcock
This was a pretty easy recipe to make. It tastes delicious! The video on youtube was super helpful to watch as I looked at the recipe just to make sure I was going it right.
Anna
A great beginner recipe! Followed steps exactly and it turned out perfect! Thanks!
Morgan
Have you ever made this with gluten free flour?
Tara
Hello
Thank you for the recipe. I am in step one.
For the kneading part.. I didn't see if I was allowed to dump it out on a floured surface and kneed it but I did that because it was too wet to work with but I did minimal flour just in case. Hoping that is okay!
As for the baking part later. I have a convection/ regular baking oven with both options. Is there a better one to choose when baking sourdough?
I will check over this recipe again and your sourdough baking 101 in case I missed it there. But I don't recall seeing anything.
Thank you for your help 🙂
[email protected]
They say it's better to baking on regular and not convection, but I bake sourdough on convection knowing that it will be ready sooner. Seems to be fine for me.
Amy Gerber
How can I make this ahead? Is it good frozen?
[email protected]
You can definitely make this ahead and freeze. I have used it as sandwich bread and also as garlic bread and it's delicious.
Tanya
Do you not do stretch and folds for a boule?I make sourdough artisan bread.and do stretch an folds.just wondering what the crumb would b without stretch folds?
[email protected]
Kate said that "it's because it's a very simple recipe and those steps aren't necessary unless you are trying to make big holed bread. This recipe is awesome without extra time consuming steps"